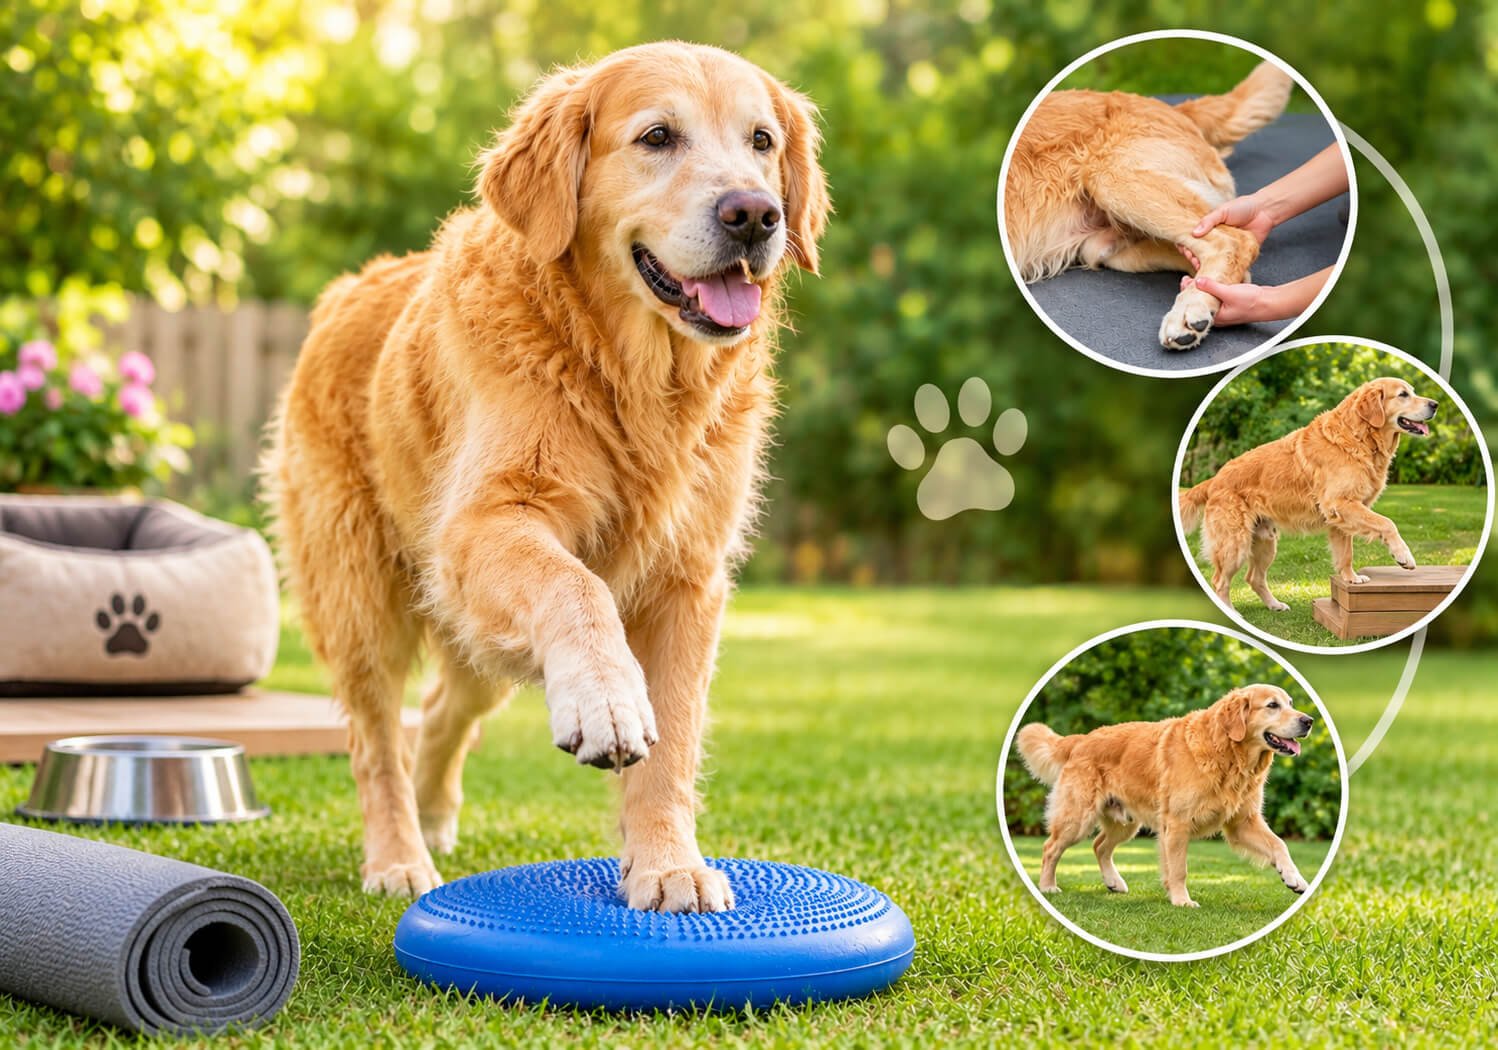
Your dog used to bound up the stairs and chase squirrels across the yard. Now they pause mid-stride, stiffen up in the morning, or skip the couch entirely. You’re not imagining it—joint stiffness and reduced range of motion are among the most common complaints I hear from dog owners, especially as pets cross into their senior years.
The good news: you don’t need a veterinary rehabilitation clinic (or a $200-per-session bill) to make a real difference. A consistent, low-impact routine of gentle stretches, balance work, and strength exercises can help restore your dog’s natural range of motion, support joint lubrication, and keep muscles engaged. This guide walks you through exactly how to improve dog mobility naturally, using movements you can do in your living room with zero special equipment.
Whether your pup is a 12-year-old Labrador with early arthritis or a 4-year-old German Shepherd showing the first signs of hip stiffness, the principles are the same: move gently, build gradually, and make it a daily habit.
QUICK ANSWER: To improve dog mobility naturally, perform 5–10 minutes of gentle passive stretches (hip flexion/extension, shoulder circles, spinal flexion) daily, add 2–3 balance and strength exercises (sit-to-stands, weight shifts, elevated-surface walks) three times per week, and support joints with omega-3-rich food and low-impact activity like swimming or short walks. Consistency over 4–6 weeks is where you’ll see measurable changes in range of motion and gait smoothness.
Why Dog Mobility Matters (and What “Mobility” Actually Means)
Mobility in a dog isn’t just about “being able to run.” It’s the combined ability of every joint—hips, shoulders, stifles (knees), elbows, spine, and even the small joints in the feet—to move through their full, pain-free range while the surrounding muscles and connective tissue stay strong and coordinated.
When mobility drops, you see it in small ways: a slower start from a lying position, a “bunny hop” on the back legs, reluctance to jump into the car, or a visible asymmetry in the gait. Left unaddressed, reduced range of motion leads to compensatory movement patterns, muscle imbalances, and accelerated joint wear.
Research in veterinary rehabilitation supports that structured, low-impact exercise and passive range-of-motion work can help maintain joint health and reduce the progression of degenerative changes in dogs, much like mobility work does for humans. A 2019 review in the Journal of Veterinary Rehabilitation noted that consistent physical therapy interventions, including passive stretching and controlled strengthening, improved gait symmetry and owner-reported mobility scores in dogs with hind-limb osteoarthritis .
The key word is consistent. A single session won’t change anything. A 10-minute daily routine, repeated for weeks, will.
Signs Your Dog Needs a Mobility Routine
You don’t need a diagnosis to start gentle mobility work. But if you notice any of the following, it’s a strong signal to build a routine (and to mention it at your next vet visit):
- Slower to get up after lying down, especially in the morning
- Stiff gait that “warms up” after a few minutes of walking
- Reluctance to jump, climb stairs, or get into the car
- A visible “stiff” or “bouncy” hind-leg movement
- Licking or chewing at a specific joint
- Decreased interest in play or walks
- Weight gain that’s making movement harder
If your dog is in obvious pain (crying, limping for more than 24 hours, refusing to bear weight), skip the exercises and call your veterinarian first.
The 7 Natural Mobility Exercises (Step-by-Step)
All of these can be done at home on a non-slip surface (a rubber mat or carpet works well). Work slowly, use treats as positive reinforcement, and stop if your dog shows resistance or discomfort. Never force a joint past its natural range.
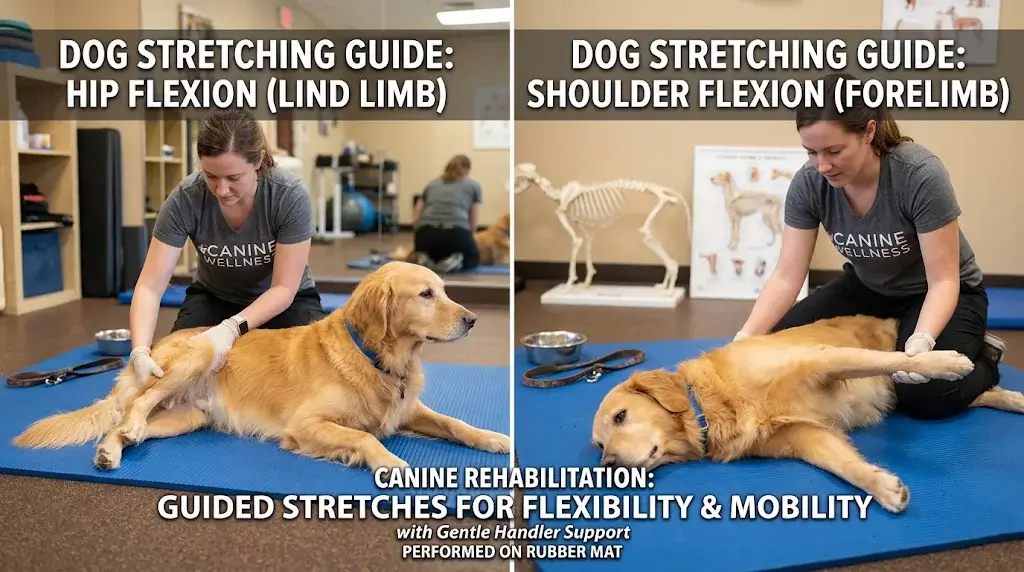
1. Hip Flexion and Extension (Passive Stretch)
What it targets: Hip joint range of motion, gluteal and hamstring flexibility.
- Have your dog lie on its side (left or right).
- With one hand, gently hold the thigh just above the stifle (knee).
- Slowly bend the hip and knee to bring the paw toward the belly. Hold for 5–10 seconds.
- Slowly extend the leg straight back, keeping the stifle locked. Hold for 5–10 seconds.
- Repeat 3–5 times per leg.
Form cue: Move in a slow, controlled arc. If your dog tenses or pulls away, you’re going too far. The stretch should feel gentle, like a mild pull, not a sharp tug.
2. Shoulder Flexion and Extension
What it targets: Shoulder joint mobility, biceps and triceps flexibility, front-limb stability.
- With your dog standing, gently hold the upper arm (just below the shoulder joint).
- Slowly lift the paw forward and up, bending the elbow. Hold 5 seconds.
- Slowly extend the leg straight forward, then bring it back to neutral. Hold 5 seconds.
- Repeat 3–5 times per front leg.
Form cue: Keep the movement in the shoulder and elbow planes. Don’t twist the limb. Your dog should stay relaxed and weight-bearing on the other three legs.
3. Spinal Flexion (Gentle “Cat-Cow” for Dogs)
What it targets: Thoracolumbar spine mobility, paraspinal muscle flexibility.
- With your dog standing, place one hand gently on the lower back (lumbar area) and the other on the chest.
- Slowly encourage a downward “round” of the back by applying very light downward pressure on the lower back while lifting the chest slightly. Hold 3–5 seconds.
- Reverse: gently encourage a mild “arch” by applying light upward pressure under the chest. Hold 3–5 seconds.
- Repeat 4–6 cycles.
Form cue: The movement is subtle. You’re not trying to bend the spine dramatically. Think of a gentle wave, not a fold.
4. Sit-to-Stand Repetitions (Active Strength)
What it targets: Hindquarter strength (quadriceps, glutes, hamstrings), stifle joint stability, core engagement.
- Cue your dog to sit (use a treat or the word “sit”).
- From the sit, cue “stand” and let your dog rise on its own.
- Repeat 8–12 times.
- For a harder version, have your dog sit on a low, stable surface (a 4-inch / 10-cm step or a firm cushion) and stand up from there.
Form cue: Your dog should push up smoothly, not “pop” up with a jerk. If the movement is jerky, reduce the rep count and focus on a slow, controlled rise.
5. Weight Shifts (Proprioception and Balance)
What it targets: Joint proprioception, core stability, single-limb balance.
- With your dog standing, gently lift one front paw off the ground for 3–5 seconds.
- Set it down. Lift the opposite front paw. Repeat 4–5 times per side.
- Progress to lifting one hind paw (support the body with your other hand under the chest to prevent tipping).
- Repeat 3–4 times per hind leg.
Form cue: Keep your dog’s head up and body level. The goal is a steady, confident hold—not a wobble. If your dog is very wobbly, shorten the hold to 2 seconds.
6. Elevated-Surface Walks (Balance and Confidence)
What it targets: Overall gait coordination, joint loading in a controlled way, confidence.
- Set up a low, stable, non-slip elevated surface: a 2–3 inch (5–8 cm) foam pad, a firm balance cushion, or a low step.
- Guide your dog to walk across it on a leash, keeping the pace slow and steady.
- Do 3–5 passes in each direction.
- Progress by increasing the surface height (up to 6 inches / 15 cm) or by using a slightly unstable surface (a soft, squishy cushion).
Form cue: Keep your dog’s head level and pace slow. If your dog hesitates or refuses, lower the height. Confidence is part of mobility.
7. Slow, Controlled Walking (Low-Impact Cardio)
What it targets: Overall joint lubrication, muscle endurance, gait smoothness.
- Take your dog for a 10–15 minute walk at a deliberately slow, steady pace.
- Focus on a smooth, even gait. If you notice a “bunny hop” or asymmetry, slow down further.
- On flat, even surfaces (grass, rubberized paths) to minimize joint impact.
- End with 2–3 minutes of a very slow, almost-strolling cool-down.
Form cue: This isn’t a “power walk.” Think of it as a joint-lubrication session. The pace should be slower than your normal walk.
COACH’S TIP: Do the passive stretches (exercises 1–3) right after a 5-minute warm-up walk. Warm joints and muscles are more pliable, and you’ll get a deeper, safer stretch. A cold hip is a stiff hip. Always warm up first.

Easier Version and Harder Progression
Not every dog starts at the same level. Here’s how to scale:
| Level | What to do | When to move up |
| Easier (Regression) | Do only exercises 1–3 (passive stretches) + a 5-minute slow walk. 5 minutes total, once daily. | Your dog tolerates all stretches without tension for 2 weeks. |
| Standard | All 7 exercises, 3 days/week for strength/balance (4–7) and daily for stretches (1–3). 10–15 minutes per session. | Your dog completes all reps with good form for 3 weeks. |
| Harder (Progression) | Add more reps (12–15 sit-to-stands), increase elevated-surface height to 6 inches (15 cm), add a “treadmill walk” on a slow, low-speed pet treadmill (1–1.5 mph / 1.6–2.4 km/h) for 5 minutes, or add a short (10-min) swimming session. | Your dog shows visible improvement in gait and range of motion over 4–6 weeks. |
Building a Daily and Weekly Routine
Here’s a simple schedule that fits into a normal day:
Daily (5–10 minutes, morning or evening):
- 5-minute slow warm-up walk
- Passive stretches: hip flexion/extension (3–5 reps/side), shoulder flexion/extension (3–5 reps/side), spinal flexion (4–6 cycles)
- 2-minute slow cool-down walk
Three times per week (add 10 minutes, e.g., Mon / Wed / Fri):
- All daily stretches
- Sit-to-stands: 2 sets of 8–12
- Weight shifts: 2 sets of 4–5 per leg
- Elevated-surface walks: 3–5 passes
- Optional: 10-minute swim or 15-minute slow walk on varied terrain
Monthly check-in:
- Note your dog’s gait on a short phone video (side view and rear view).
- Compare to last month. You’re looking for smoother stride, less “bouncing,” and quicker transitions from lie to stand.
Nutrition and Natural Joint Support
Exercise is the engine, but fuel matters. A few dietary adjustments can support the joints you’re working on:
- Omega-3 fatty acids (EPA/DHA): Found in quality fish oil or salmon. Omega-3s are linked to reduced inflammatory markers in dogs, which may help with joint comfort. Aim for a high-quality fish oil supplement appropriate for your dog’s weight, or add sardines or mackerel to meals a few times per week. Talk to your vet about the right dose for your dog’s size.
- Adequate protein: Supports muscle mass, which is what actually stabilizes joints. A diet that’s too low in protein can lead to muscle loss, making joints work harder.
- Healthy body weight: Every extra pound of body weight multiplies the load on hips, stifles, and shoulders. If your dog is overweight, a slow, vet-guided weight-loss plan (targeting 1–2% body weight loss per week) is one of the most effective “natural” mobility interventions you can make.
- Hydration: Synovial fluid (the “lubricant” inside joints) is largely water-based. Fresh water should always be available.
- Glucosamine and chondroitin: Some owners add these to support cartilage health. The evidence in dogs is mixed, but a small number of studies suggest modest benefits for comfort in dogs with early osteoarthritis. Discuss with your vet before adding supplements, especially if your dog is on other medications.
COMMON MISTAKE: Skipping the warm-up and going straight into passive stretches on a cold dog. A cold joint has less synovial fluid circulation and is more prone to micro-strain. Always do a 5-minute slow walk or gentle trot before stretching. If your dog is very stiff in the morning, let them “shake out” and walk for 5 minutes before you begin.
Who Should Be Careful (and When to Call the Vet)
Gentle mobility work is appropriate for most healthy dogs, but pause and consult your veterinarian before starting if your dog has:
- A diagnosed orthopedic condition (cranial cruciate ligament rupture, severe hip dysplasia, spinal disc disease)
- An active injury, fracture, or post-surgical recovery period
- Unexplained pain, swelling, or heat in a joint
- A neurological condition (tremors, incoordination beyond stiffness, weakness)
- A history of seizures or a condition where certain movements could trigger episodes
Your vet or a veterinary rehabilitation specialist can confirm which movements are safe for your specific dog and may recommend a tailored plan.
This article is for general information and is not a substitute for advice from a veterinarian. If your dog is in pain, limping, or showing neurological signs, seek veterinary care before starting any exercise routine.
5 Common Mistakes (and How to Fix Them)
- Forcing a stretch past the end range. You’ll feel a “wall” in the joint. Stop there. Pushing past it can irritate the capsule and create more stiffness. Fix: Reduce the range by 20% and build up over weeks.
- Doing the routine only when your dog is “acting up.” Inconsistent work won’t build the joint adaptations you need. Fix: Put it on your calendar like a feeding time. Ten minutes, every day, even when your dog “seems fine.”
- Going too fast on the strength exercises. A jerky sit-to-stand loads the stifle joint in a way a slow, controlled one doesn’t. Fix: Count “one-two” on the way up. If your dog can’t do 8 slow reps, do 5.
- Ignoring the front legs. Most owners focus on the hips and hind legs (because that’s where the visible stiffness is). But shoulder and elbow mobility matter just as much for a smooth gait. Fix: Include the shoulder stretches and front-leg weight shifts every session.
- No non-slip surface. A dog doing balance work on a slick hardwood floor is at risk for a slip and a secondary injury. Fix: Use a rubber exercise mat, a thick carpet, or a non-slip yoga mat.
How Long Before You See Results?
Be patient. Joint and connective tissue adaptations are slower than muscle changes. Here’s a realistic timeline based on what I’ve seen in consistent, well-executed routines:
- Week 1–2: Your dog may feel slightly “looser” after sessions. Gait changes are minimal. This is the consistency-building phase.
- Week 3–4: You may notice a smoother start from a lying position, less “bunny hopping,” and a slightly wider range in the hip stretch.
- Week 5–8: Gait symmetry often improves. Your dog may show more willingness to jump or climb. The passive stretches should feel less “resisted.”
- Beyond 8 weeks: Continued maintenance. The routine becomes a habit, and you’re protecting the mobility you’ve built.
If you see no change after 6–8 weeks of consistent work, or if symptoms are worsening, schedule a veterinary evaluation. There may be a structural issue that exercises alone can’t address.
FAQ
How often should I do mobility exercises with my dog?
Passive stretches (hip, shoulder, spinal) can be done daily, 5–10 minutes. Strength and balance exercises (sit-to-stands, weight shifts, elevated walks) are best done 3 times per week with a rest day in between. Consistency matters more than duration.
Can I improve my senior dog’s mobility at home without a vet?
Yes, for general stiffness and age-related loss of range of motion, a gentle home routine is appropriate. However, if your senior dog has a diagnosed condition (arthritis, hip dysplasia, disc disease), get a vet’s green light and specific movement restrictions before starting.
What foods or natural supplements help dog joint flexibility?
Omega-3 fatty acids (from fish oil or oily fish), adequate high-quality protein, and maintaining a healthy body weight are the most evidence-supported dietary supports. Glucosamine and chondroitin have modest, mixed evidence in dogs. Always check with your vet before adding supplements.
How do I stretch a dog that resists or pulls away?
Stop the stretch immediately. Try a shorter, slower session with more treats and praise. Work on the less-affected side first to build trust. If resistance is consistent, your dog may be in pain—see a vet before continuing.
What’s the best low-impact exercise for a dog with stiff joints?
Swimming (in a safe, shallow area or a pet pool) is the gold standard: zero joint impact, full-body muscle engagement. Short, slow walks on soft, even terrain (grass, dirt trails) are the next best option. Avoid hard surfaces and high-impact activities like jumping or sprinting.
How long before I see results with dog mobility exercises?
Most owners notice subtle improvements (smoother gait, easier standing) by week 3–4 of a consistent daily routine. More significant changes in range of motion and confidence typically appear by week 6–8. If there’s no improvement after 8 weeks, consult your veterinarian.
Final Thoughts: Small Movements, Big Difference
Improving your dog’s mobility naturally doesn’t require a fancy setup, a specialist, or a big time commitment. It requires ten minutes a day, a non-slip mat, a few treats, and the patience to go slow. The stretches, the sit-to-stands, the slow walks—they’re small, unglamorous movements. But done consistently, they keep synovial fluid circulating, muscles engaged, and joints moving through their full range.
Start where your dog is. If they can only tolerate three gentle hip stretches today, that’s a win. Add a sit-to-stand next week. Add a balance walk the week after. The goal isn’t a performance. The goal is a dog that moves comfortably, confidently, and without the little wince you’ve been noticing.
Your dog doesn’t need to be “fixed.” They need to be moved, gently, regularly, and with your steady hand and a calm voice. That’s how you improve dog mobility naturally. And that’s more than enough.
This article is for general information and is not a substitute for advice from a doctor or physical therapist. Always consult your veterinarian before starting a new exercise or supplement routine for your pet.